
Key Highlights
- Learn smoke testing basics and its significance in software testing.
- Discover different types such as manual, automated, and production smoke testing.
- Understand the process of performing effective smoke tests with step-by-step guidance.
- Optimize your efforts by leveraging tools like Golive to manage test environments.
- Catch major issues early to save time for more detailed testing.
You might have come across the term "smoke testing” right? It’s a basic concept in QA processes that’s easy to understand but has significant importance in ensuring that software functions correctly before deeper testing begins.
But what exactly does "smoke testing" mean, and why is it so important in the testing lifecycle? Let’s break it down together.
What does Smoke Testing mean?
At its core, smoke testing refers to the practice of running a basic set of tests on a new build of software to make sure that the most critical features are functioning. Think of it as a quick "health check" for the software. It’s not meant to find deep bugs but to ensure that the application doesn't crash and that the main features are working before more extensive testing takes place.
Curiosity session: the term "smoke testing" originates from hardware engineering, where engineers would test newly assembled equipment by powering it on and checking if anything "let out smoke". It's also known as "Build Verification Testing (BVT)" or "Build Acceptance Testing". It was a quick way to verify that the basic system was functioning before conducting more detailed tests.
In this guide, we’ll walk through the types of smoke testing, explain how it fits into the QA process, and show you how to perform a smoke test. We’ll also explore the environments where smoke testing is performed and discuss how certain tools can assist in managing these environments.
Why Smoke Testing Matters
Before exploring the types of smoke testing, let's understand why it’s so important. Imagine you’ve just received a new build of software, and you need to test it quickly. You don’t want to spend hours on detailed testing only to find out that the software won’t even launch or that critical features are broken. This is where smoke testing in QA becomes relevant.
Smoke testing helps QA teams identify major issues early in the development cycle. It acts as a filter to catch obvious errors before they become bigger problems. This way, your team can focus on more detailed testing for the rest of the project, knowing the basics are covered.
Given that you understand why it’s important, let’s explore the different types of smoke testing you might encounter.
Types of Smoke Testing
There are a few types of smoke testing that are commonly used in software testing. Each one serves a slightly different purpose, depending on the situation.
Each type of smoke testing has its place, depending on the complexity of the software, the size of your team, and the resources available. After looking at the different types, it’s important to know how actually to perform smoke testing.
How to Perform Smoke Testing

Performing smoke testing is relatively straightforward. Here's a simple guide to get you started:
- Identify Critical Features
The first step is to determine what parts of the application are most important. These might include login screens, search functions, or other key features that the software cannot function without. - Create Basic Test Cases
For each critical feature, create simple test cases that check if the feature is working at its most basic level. For example, for a login screen, you might test if you can log in with a valid username and password. - Run the Tests
Execute the tests manually or with automated scripts (depending on your approach). If any test fails, the build should be rejected, and you’ll need to address the issue before proceeding with further testing. - Report Results
Document the results of the tests and pass them along to the development team. If all critical tests pass, you can move on to more detailed testing.
This is a basic approach to smoke testing in QA, and while it’s not exhaustive, it’s a great starting point to ensure that your software is functioning properly before further testing. But where should this testing be done? Let’s explore that next.
Environments for Smoke Testing
Smoke testing can be done in different environments depending on the stage of the software and the team’s resources. The key is to make sure that the environment matches the final production environment as closely as possible.
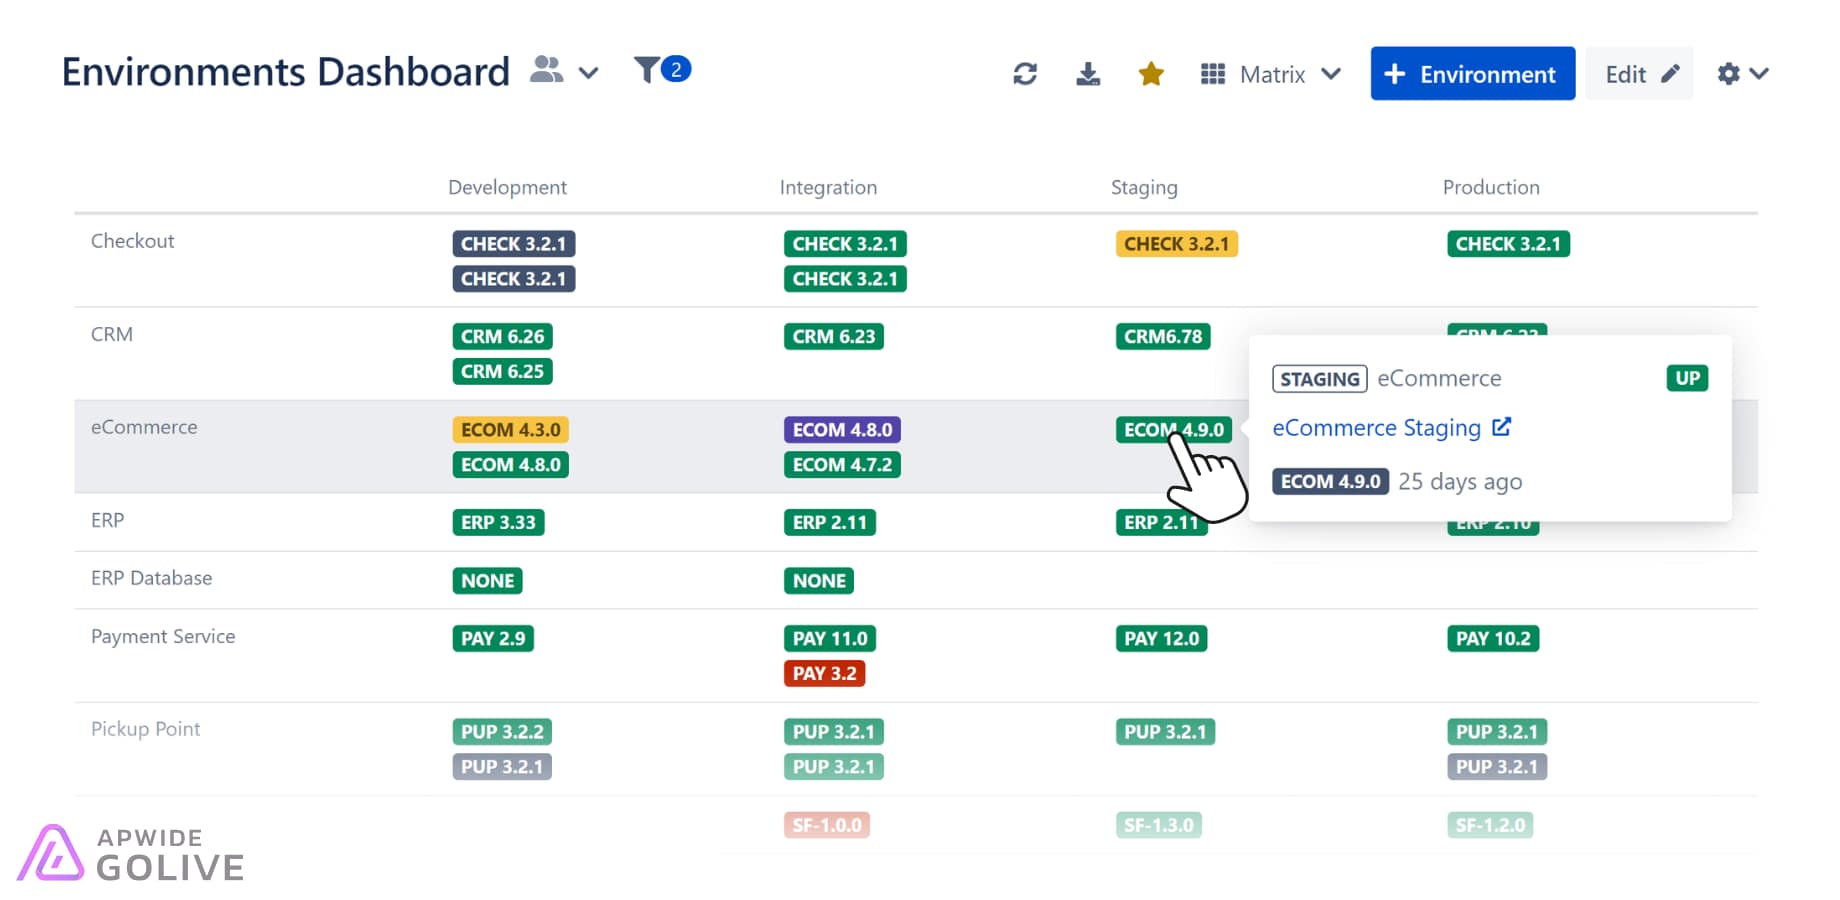
Managing these environments efficiently is fundamental for running successful smoke tests. This is where Apwide Golive proves to be invaluable. Golive helps you manage different test environments in one place (Jira), making it easier to track and manage smoke tests across multiple environments. Through using Golive, you can gain full visibility into the status of each environment, improve communication between teams, and avoid conflicts during testing and deployments.

Live dashboard with the versions deployed on the test environments
How Golive Can Help Manage Test Environments for Smoke Testing
With Golive, managing test environments becomes more efficient and less stressful. Here’s how:
- Centralized Environment Management: Golive lets you keep track of all your testing environments, from development to production. This makes it easy to ensure that your smoke testing is always conducted in the right environment.
- Clear Visibility: You can get real-time updates on the status of each environment, making it easier to know if everything is set up correctly before running your tests.
- Simplified Deployment Tracking: With the integration of Golive into your toolchain (Jenkins, GitHub, Azure DevOps, Kubernetes, and more), you can link smoke tests to specific releases, ensuring that you always test the most up-to-date version of the software.
For more information on how to set up and manage test environments effectively, check out our Test Environment Management Best Pratiques guide.

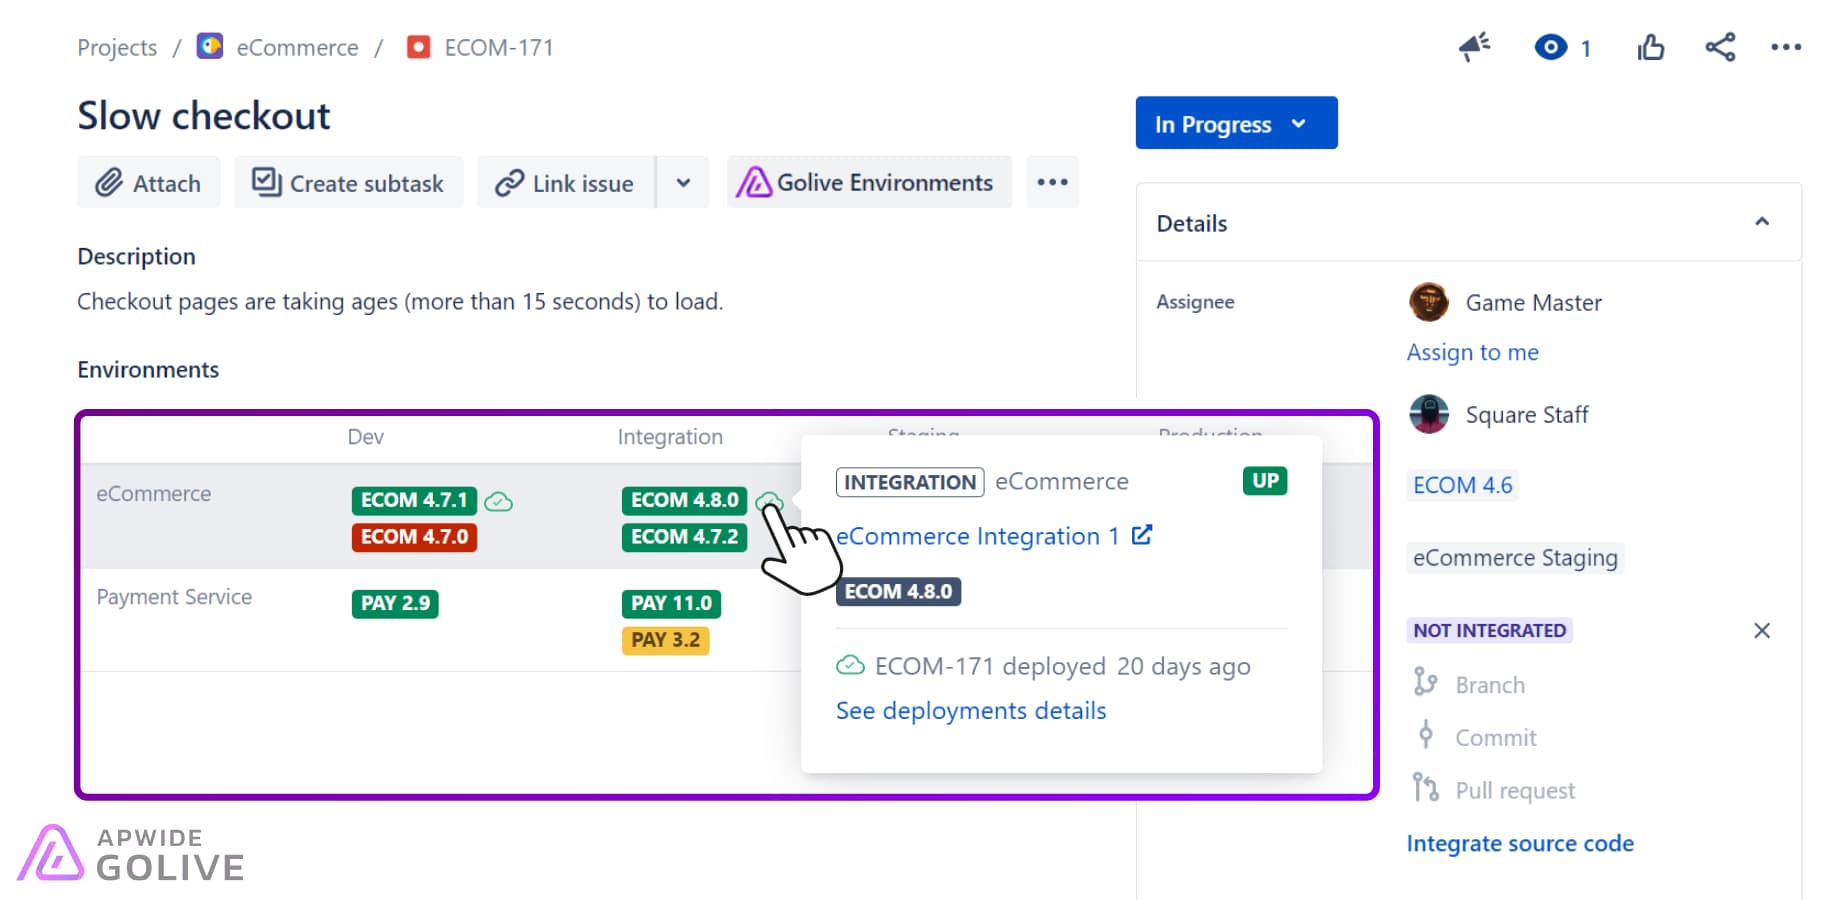
Testers know at any time where their Jira work items have been deployed
Conclusion
To summarize what we’ve covered, here’s a quick look at the main points of smoke testing:
- Smoke testing is a simple, high-level check of critical functionality in software.
- There are different types of smoke testing, including manual, automated, and production-based testing.
- Performing smoke tests involves identifying critical features, creating test cases, running the tests, and reporting results.
- Test environments are essential for determining where and how smoke testing is performed, and tools like Golive can help simplify environment management.
Key Takeaways
- Smoke testing helps catch major issues early, allowing teams to focus on deeper testing later.
- Automated smoke testing can save time and reduce errors, especially for teams working with frequent builds.
- Managing test environments efficiently, with tools like Golive, makes it easier to run smoke tests across multiple platforms and keep your testing process organized.
With these insights, you should have a better understanding of what smoke testing is, why it matters, and how to implement it effectively in your workflow.

I love performing Smoke Tests, mostly when I don't have much time!
I appreciate your skill to turn mundane topics into intriguing content. Well done!